Photography, Photoshop
Sharpening
I was reading an article on Photoshop CS5 when it came out first and it mentioned that one of the new features was “the most advanced sharpening algorithm ever”. As sharpening , particularly with digital images, is critical to making the most of your images, I was keen to try out this brand new way of sharpening!.
 Now its probably worth looking at the regular sharpening tools and how you might use them (or at least how I use them).
If you are like me, then you probably reach for unsharp mask first to deal with most sharpening needs. For the most part, this discussion is primarily aimed at sharpening portraits so I normally don’t want to sharpen everything and usually end up duplicating layers and masking off parts of the image.
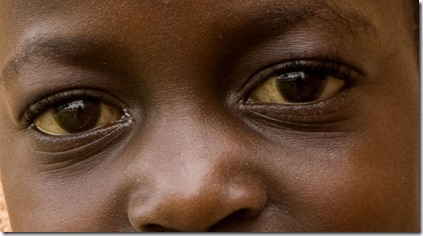
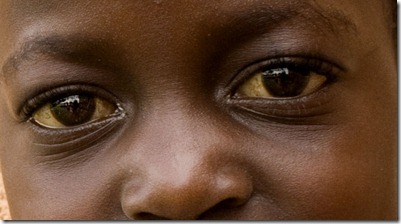
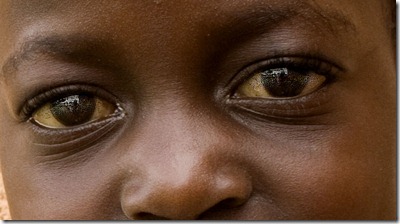
So for this exercise, I’m going to use this image of a young boy I took in Uganda. For the purposes of the comparison, I’m going to focus on sharpening the eyes .
The image was taken on a 5D with a 24mm prime lens, shutter speed is 1/60th of a second at F/13.
In the next few sections, I’ll run through the different sharpening techniques and the settings used.
So first up, lets look at the traditional Unsharp mask:

 Typically, settings for the most common Unsharp mark requirements are
Amount – 100 to 180
Radius – 1 to 2
Threshold – 1
The actual amounts depend on the actual image and there are some who advocate:
Amount – 250 to 300
Radius – 0.25 to 0.4
Threshold – 1
I have to admit, I’ve never seen a big difference – but I would definitely encourage experimenting to find results that suit the image being worked on.
Next up is the Hi-Pass filter:
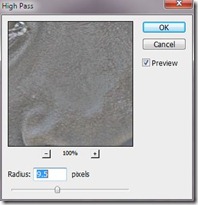
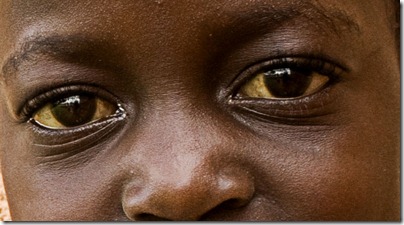 This is a sharpening method when I want a coarse or grungy feel to the portrait. It does not really suit a portrait of a young boy.
For those not familiar with this method of sharpening, look out for a future post of this!
The previous techniques are really designed for global sharpening, where in the main, you need to sharpen the entire image. This next technique is designed just to sharpen localised areas.
The Sharpen tool
The sharpen tool has been in Photoshop for quite some time (maybe even since the beginning) but it traditionally has been a very coarse and destructive method of sharpening – the type of thing you try once and swear never to bother again! However, this is where Photoshop’s new enhanced sharpening algorithm is hidden!
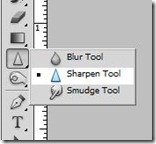 To activate the tool, click and hold on the blur tool and choose the sharpen tool. This tool is used as a brush and you can brush on the areas you want to sharpen.
Sharpen options
 The “Protect Detail tick box is what makes this sharpen tool different from the sharpen tool in previous versions of Photoshop.
So to use the sharpen tool on the eyes of the portrait, make sure the “protect detail” box is checked and set the strength to around 30%
Sharpen tool with protect detail ticked
 Sharpen tool, with protect detail un-ticked
 So, there are a couple of simple sharpening techniques. There is no “best one” for all images and in a lot of cases, a combination of techniques works best!
I’ve included the Photoshop PSD file use to generate the above images, with the individual layers so you can see the effects of the different sharpening techniques more closely .
[dm]3[/dm]


3 Comments
Ciaran
I have a few issues with this approach. For one, unlike the other “global” sharpening techniques, you don’t really get to preview the effect until you actually apply it. So you have no idea if you have too much or too little sharpening until you start brushing over the image.
Secondly (and this is perhaps because I am so set in my way), you have so little control. With smart sharpen and USM you can really control how the sharpening is applied. This is just a percentage (percentage of what?).
I think for now, I’ll stick with the global sharpening and using masks to apply it to local areas,.
Gerry
Hi Ciaran,
So far, I ‘ve only used it for small areas (eyes for eample) and I like the “look” if you know what I mean. The protect detail feature would appear to be very good at doing just that. Im certainly not advocating this partiular tehnique as a global sharpening technique, but its an interesting tool and can be the best solution in some circumstances. I think that like a lot of photoshop features, it got its place, its just a matter of finding that place ! 🙂
Gerry
Lola
Thanks Gerry this was well explained and easy to understand, even I should be able to try it 🙂